Monday, June 23, 2008

Starting on hair & recasting foot piece

-------------------------------
Time: 3 hrs 36 mins
Total Time : 20 hrs 14mins
-------------------------------
I had a few hair front pieces from other kits I was tempted to use but I've been avoiding any serious attempts at sculpting for a long time now so I forced myself to have a go. It took forever but I ended up with a result that I'm comfortable with. I'll make a silicone impression for this and make a resin copy as the Klean Klay used never dries/sets.


The shoe cover piece was also sculpted from Klean Klay so I brushed on two layers of silicone leaving time inbetween them to dry. The silicone is a 1:1 volume ratio and prethickened, making it a lot easier to measure and work with than normal liquid RTV silicone. Also because it's thick you don't need a mould box for small items.


A thicker layer of silicone was added once the first layer cured, no mould release was needed silicone comes off most things quite easily. There is a large gap that needed to be filled otherwise the resin would leak over and I wouldn't be able to cast the piece. I used some polyester putty for this, I tried clay to start with but I couldn't get it to adhere to the silicone. The putty didn't completely seal the open area but it did a good enough job.


I finally cast the piece in resin, which is normally chalk white and very high quality however I was being incredibly lazy and just measured out the 1:1 ratio by eye. I wouldn't do this on a proper model but I was too tired so it ended up coming out this weird clear yellow colour and took forever to set instead of 30 mins. Never mind, still got the result I wanted, a copy of my clay shoe cover in a hard material!!

Friday, June 20, 2008

Further progress on shoe

-------------------------------
Time: 3 hrs 10 mins
Total Time : 16 hrs 38mins
-------------------------------
I added some more Magic Sculpt to the basic shoe shape to "fill out" the shoe as it was quite skinny. I also added in the 'cuff' if that's what its called, the bit at the top of the shoe that sits against the ankle. Compared to the original, it's a nicer, more realistic shoe shape.


I don't find the Magic Sculpt the best product to sculpt finer details with, probably because I haven't gotten used to it yet and don't leave it sit to harden a little. I find the Klean Klay the best material but it's eternally soft so it makes things difficult as you cant paint or sand, it's just soft clay. I sculpted the piece that fits over the top of the shoe. The yellow part is Mori Mori.


Lastly, I make some more changes to help even out the head, it's really crap when hair is attached to the head, even when you aren't modding anything and just building!!!


Saturday, June 14, 2008

Sculpting the shoes

-------------------------------
Time: 2 hrs 30 mins
Total Time : 13 hrs 28mins
-------------------------------
To start the shoes off I drew one foot on paper while holding the model on the paper, side on. Then I traced the shoe, cut it out and taped it down at an angle next to the other to get a visual idea of the shoes.


Then I mixed up some of the Selley's Plastibond and spread it on the picture trying to keep in the lines. It cures in minutes which is why I use it all the time, once it cured I peeled it off the paper and realised that the impression of the pencil is transferred onto the back, so next time I use it I wont be so particular about getting it in the lines.


Then I mixed up about a 2.5cm diameter ball of magic sculpt an filled in the basic three dimensional shape around the flat putty shoe. The best part about having the putty shoe is that you keep pressing your shape around the outline of the putty part and it keeps the magic sculpt parts conforming to the shape, making sculpting this much easier than by hand.


I have the basic shape now but Bridget's shoes are quite bulky and different to this but I just wanted something simple to start on. I did try playing with the original shoes and sculpting over them but I didn't like the shape of them and couldn't get comfortable with the mod, so decided to get them organised from scratch.

Monday, June 09, 2008

Fixing right leg and uneven thigh joins

-------------------------------
Time: 2 hrs 24 mins
Total Time : 10 hrs 58mins
-------------------------------
Just a small update on tonight's work. I can't stand when limbs do not sit inside clothing, it looks horrible. So I decided to saw off the right leg, bore out some of the underneath of the skirt and stick the leg back in.


Now the joins left where I removed 2cm off each thigh are very bad, also Bridget being a young male could probably do with thinner thighs anyhow so I fixed up the legs by pinning and supergluing the legs to their new thighs, then sanding a lot of the excess away with a Dremel. My Dremel is broken at the moment, when its on it's full speed and I can't fix it, when I sand (or anything) it's extremely hard to control and I end up making a bigger mess that if it was working correctly, no problem really just means more putty.


Overall the result of shortening the legs is much easier to see now they are evened out at that join. I liked the idea of having one leg behind him, a bit more interested than just having them together, seeing as the torso looks insanely bent (in the original sculpt) I thought I'd give it an anatomical reason for leaning back so far, beforehand with the legs just straight together it looked weird.


Saturday, June 07, 2008

Left arm repositioning, hair removal & leg resizing

-------------------------------
Time: 6 hrs 9 mins
Total Time : 8 hrs 34mins
-------------------------------
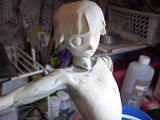
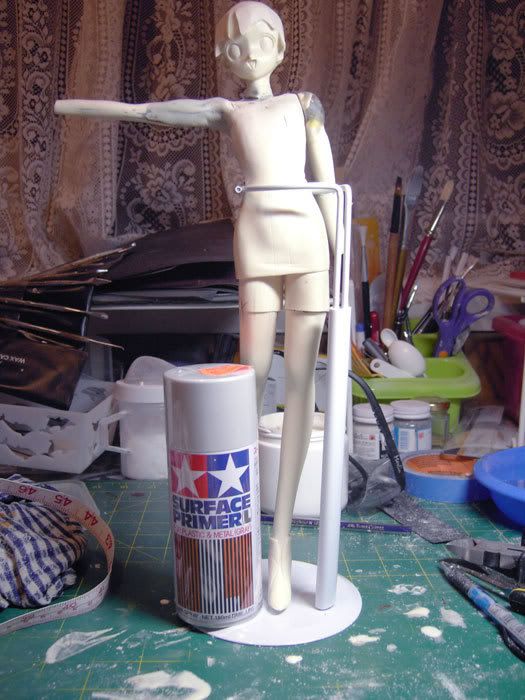
This is a huge update, it's been 3 months since I worked on the kits, partially due to being overseas for 6 weeks and the rest is atypical procrastination due to my life being quite hectic and a lot going on!!! I've been working on Bridget over the last week for an hour or so a day. Instead of perfecting each section then moving on (like I was doing with Shuichi) I'll keep everything rough and keep adding more details as I go along.

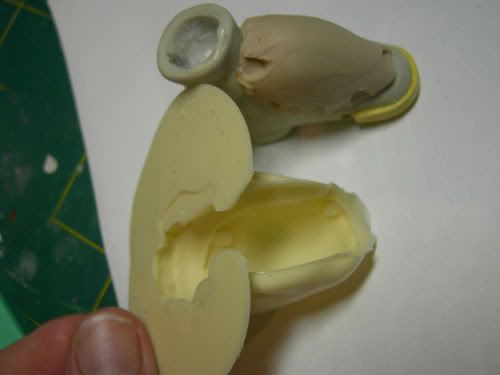
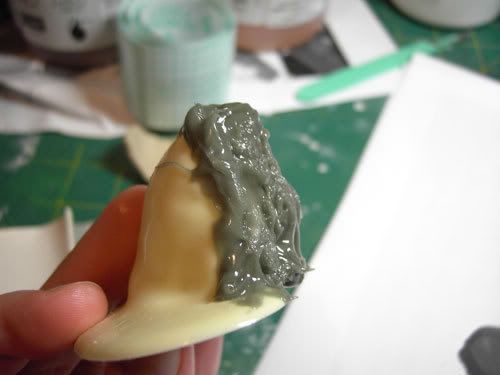
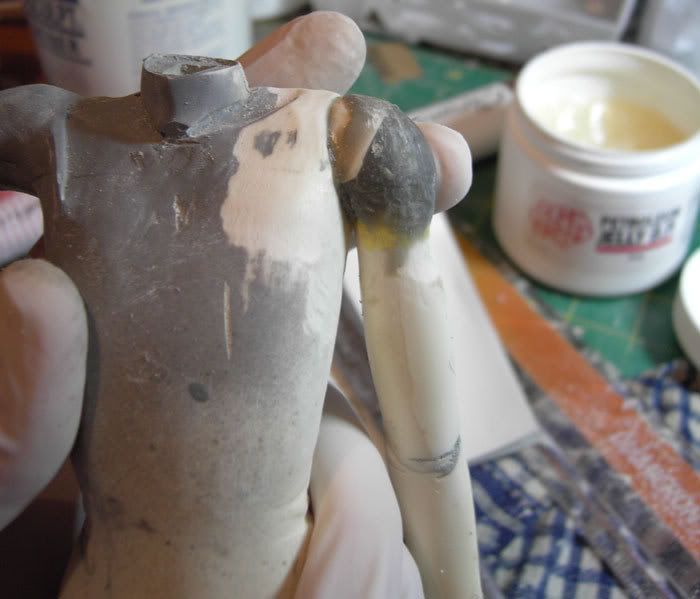
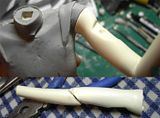
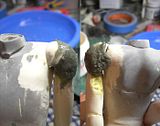
First, I wanted to reposition the left arm. The arm was cut at the elbow, forearm turned around and pinned back together to be straight. The upper arm is also now facing the other way, as in where the bicep was is now behind and has become the tricep. The arm was positioned to be sitting behind the body as per the reference pic and puttied to close the gap between the top of the arm and the body to form the shoulder.


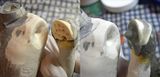
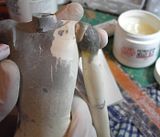
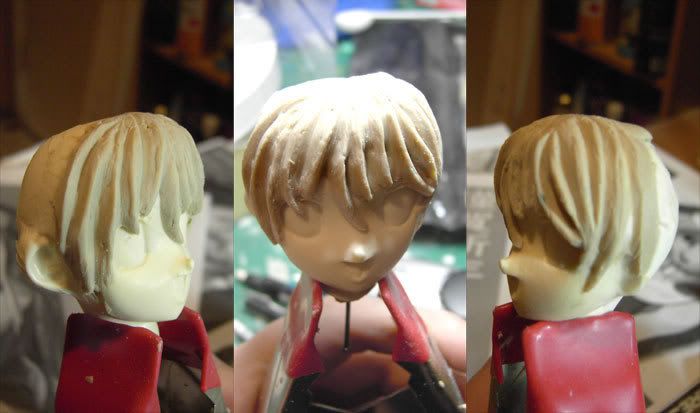
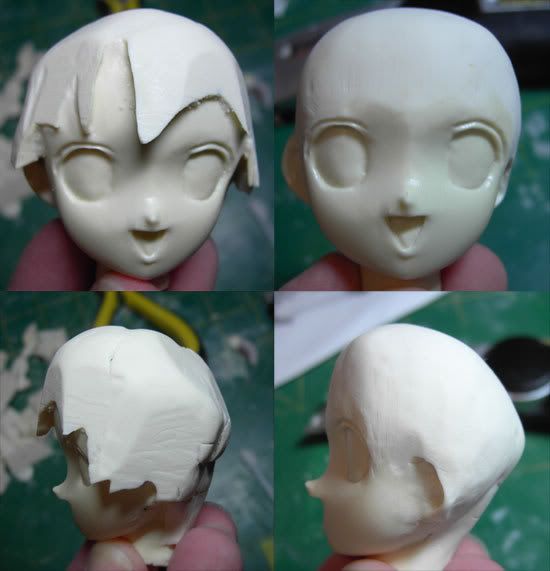
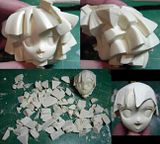
Next, I wanted to remove that awful hair, I can't stand when hair is sculpted on to a garage kit instead of being a separate piece. This took hours, maybe 3 hours with a Tamiya hobby saw. The dremel cutting wheel wouldn't budge it and the sanding wheel wouldn't reduce it as I hoped to sand it away after the wheel didn't work, so it all ended up being done by handsawing, it was rotten, I had to keep the blade saturated with Vaseline so it would move through the chunks. I've left some bangs there for now but will probably remove them. You can see all the little chunks I removed.

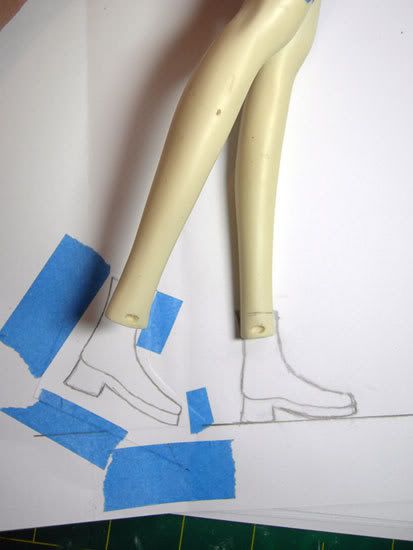
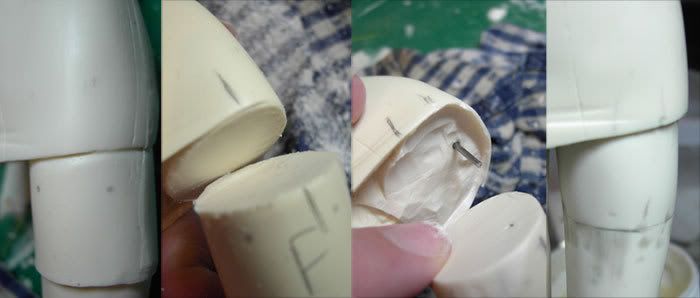
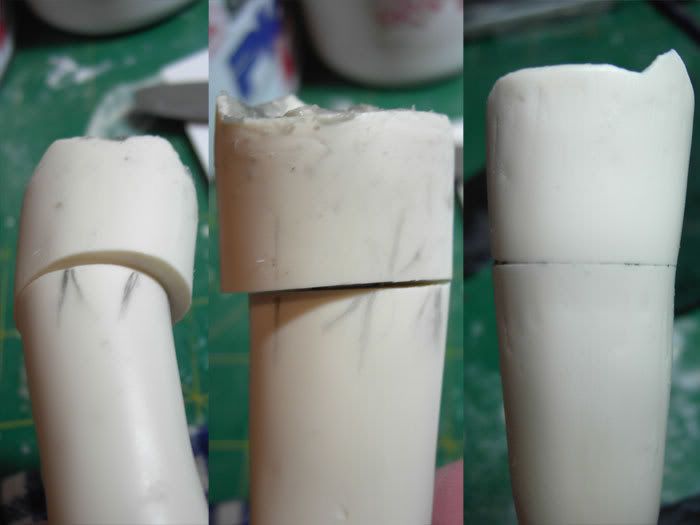
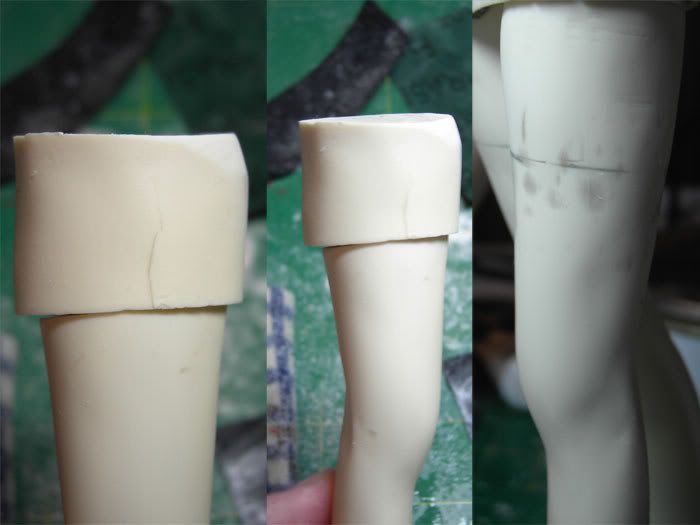
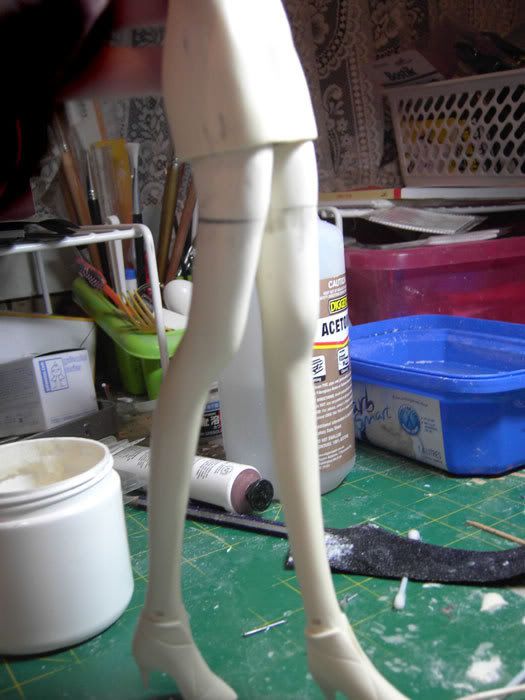
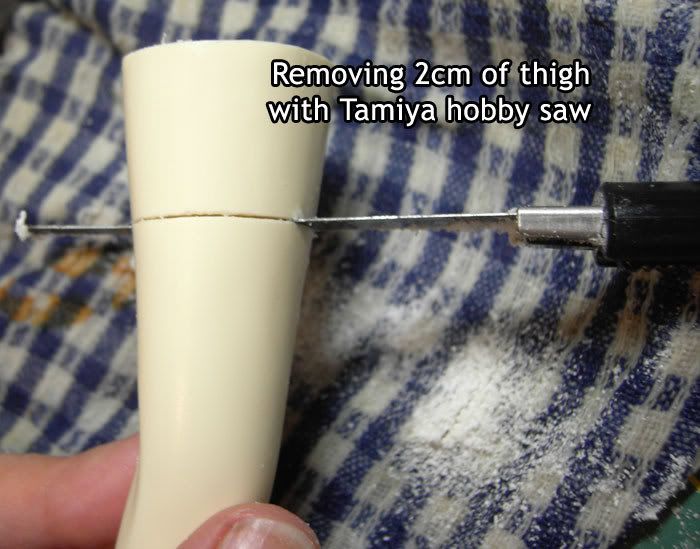
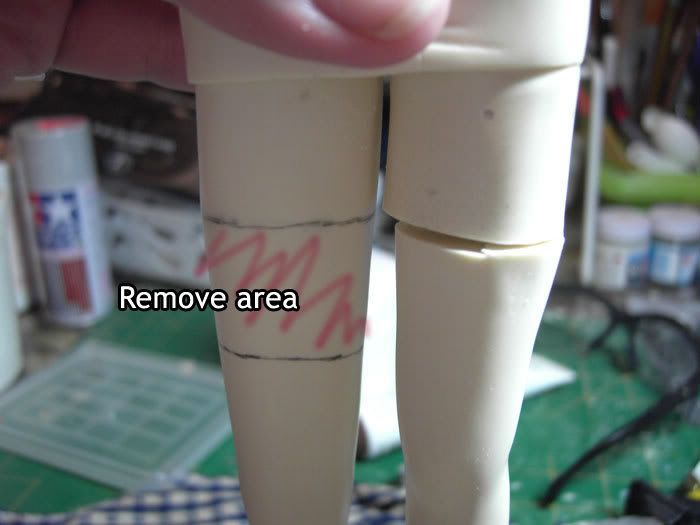
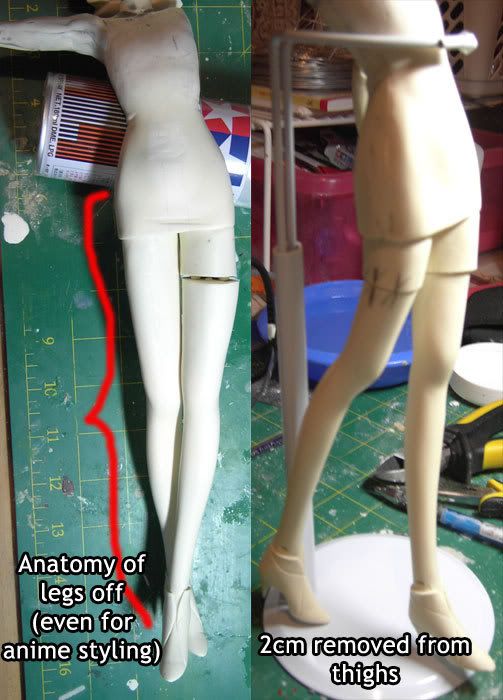
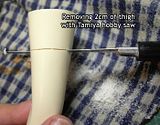
Lastly the legs are far too long, I planned to take 4 cm off each, but after taking 2cm from the thighs I was happy and didn't feel the need to take the rest off. Again using the Tamiya saw but this time it was a breeze, the resin for some reason wasn't as difficult to get through as the resin on the hair.

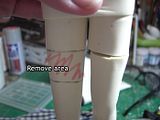
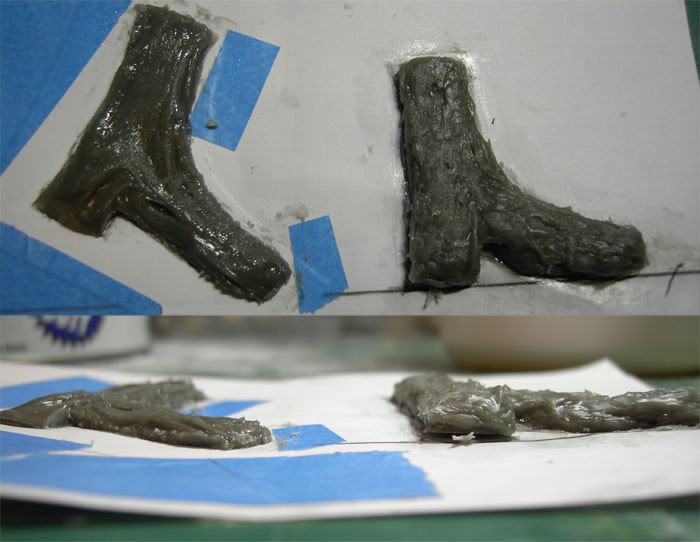
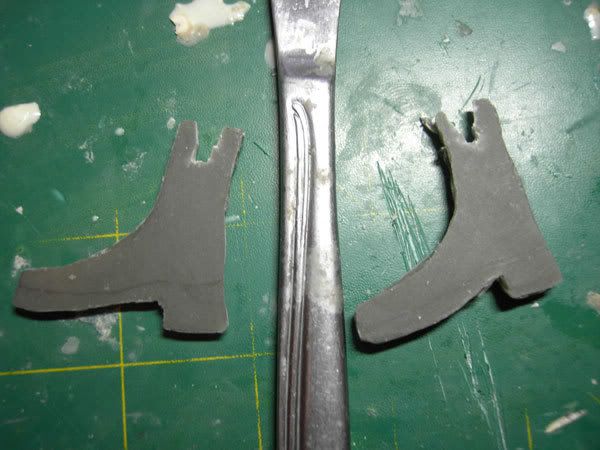
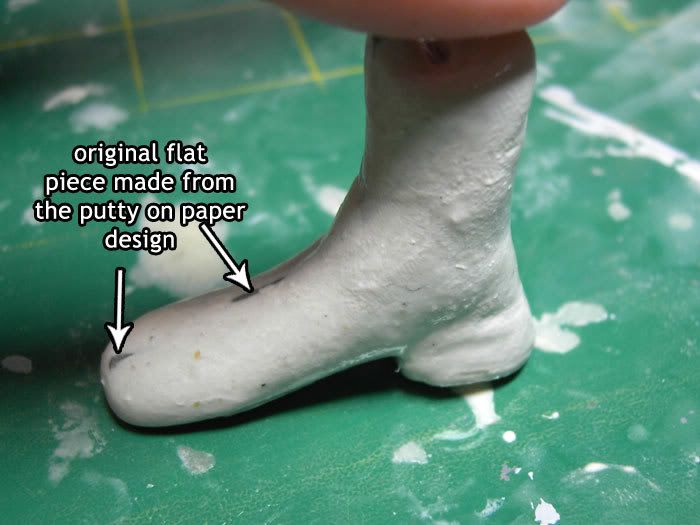
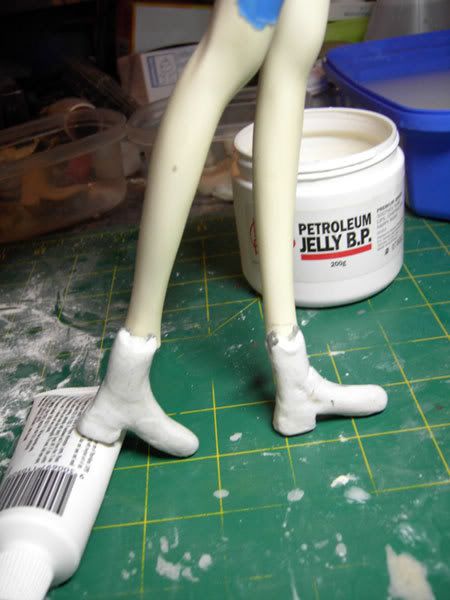
Next job to do is to fix up the joins on the thighs from the shortening of the legs and to roughly sculpt the shoes.