


Time: 5hrs 41mins
Total Time : 70hrs & 18mins
-------------------------------
Onto the front of the cloak finally as although I had other things I was going to do first I had had enough of looking at those horrible raw edged on the front of the cloak. Shuichi has a standard upper
 collar and front for most jackets although the upper collar is worn upwards instead of folded down so it covers the neck. I should have used magic sculpt but it really is a pain waiting for it to cure overnight. The putty is a little more fiddley but at least you can glue and sandpaper the piece in the same session as creating it. I thought I’d try a different technique that I saw in this modellers site some time ago (http://homepage2.nifty.com/%7Ezan/nekoban/z_fig34.htm) Basically you draw a shape and put your modeling material on top of it. I don’t know the product he uses though but it looks good!!!
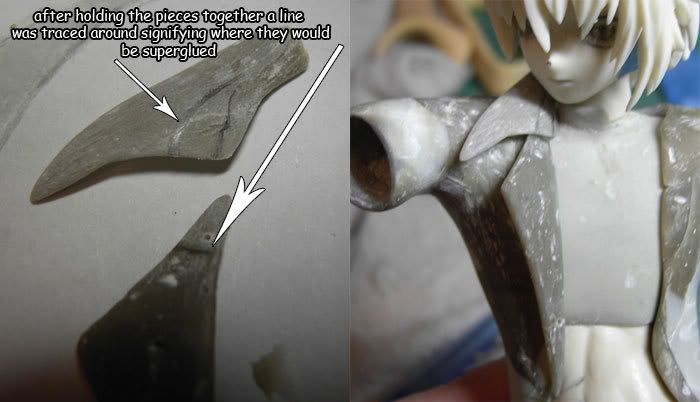 After a few minutes the product starts to heat up and it’s like a rubber consistency and it’s bendable, this is when I placed both pieces along the front of the cloak (at the angle I wanted them) and held for about another minute so they would set curved instead of flat.
I then drew the second part of the collar on one side only and repeated the process. I held the bottom piece on top of the top piece and drew the outline so I wouldn’t forget how they lined up. I then glued them together.
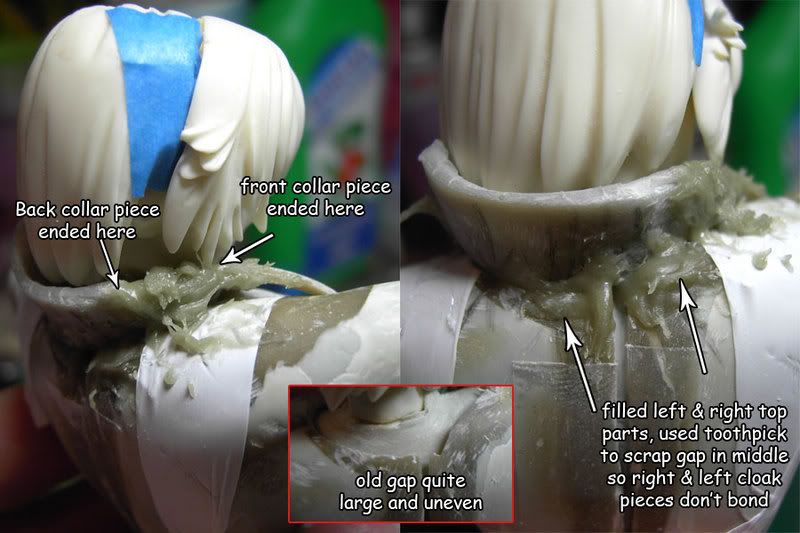 I quite like the curve that the upper collar had on the shoulder so I wrapped the should and upper body up to join the back collar with the new front piece and to fill in the gaps right at the top of the cloak so the collar fitted nice and snug. I had to scrape the putty from the middle of the cloak as I need this gap left permanently so he can be displayed with or without the cloak.
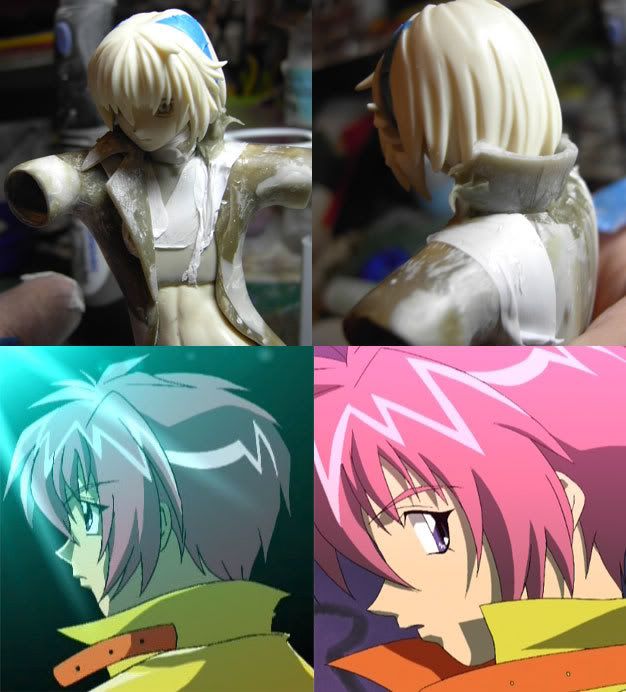 I’m happy with the way it sits, I had some putty left over so put some on the back collar around the other side. In the next session I’ll need to repeat the process for the other side as I only have the bottom triangle done. The collar will come in the one piece that extends down the front seams of the cloak. Whoever is assembling it will be expected to leave this piece separate and add it to the model via magnets along with the cloak pieces. I considered sawing down the middle of the collar and leaving left and right separate like the cloak but I feel this would be an aesthetically ugly design.
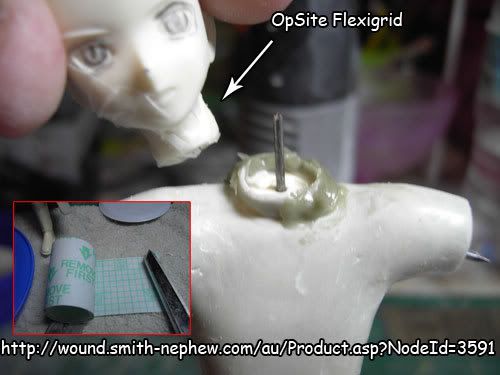 Lastly I needed to fix the shirt collar underneath as it broke again. I wasn’t going to use magic sculpt again, one of it’s limitations are if you are joining to an area with superglue it’s not very strong.
Instead of using the plumbers tape this time I decided to try and use something called “OpSite Flexigrid”, it’s a material used for dressing and the surgery used it last Wednesday to waterproof the dressing on my finger. I kept looking at it all day thinking, wow it’s so thin and it has a strong tack. The plumbers tape is good but if you play with the area too much it becomes dislodged easy as it has no tack at all.
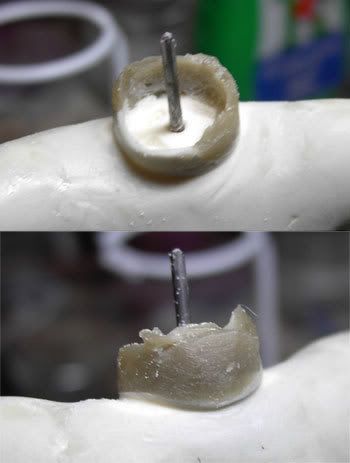 As you can see the OpSite conforms very nicely to the shape of the head. It’s a bit of a pain to use because you have to ‘crack’ it in two places before you peel the first layer off (which reveals the sticky part), then you stick it to the object, then you peel the other layer off but if you haven’t cracked it in the right spots beforehand you’ll render the piece useless (already wasted two sheets of it). I then used my good friend the Selley’s putty and resculpted the new piece. It’s been sanded somewhat but still needs to be finished off.
No comments:
Post a Comment