Monday, June 09, 2008

Fixing right leg and uneven thigh joins

-------------------------------
Time: 2 hrs 24 mins
Total Time : 10 hrs 58mins
-------------------------------
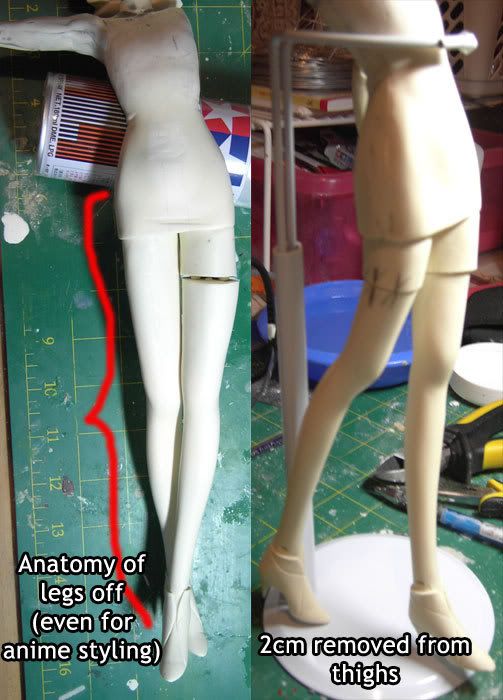
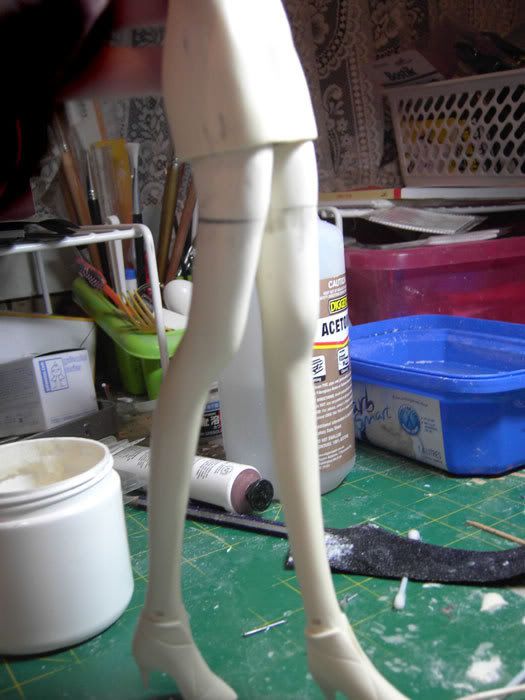
Just a small update on tonight's work. I can't stand when limbs do not sit inside clothing, it looks horrible. So I decided to saw off the right leg, bore out some of the underneath of the skirt and stick the leg back in.
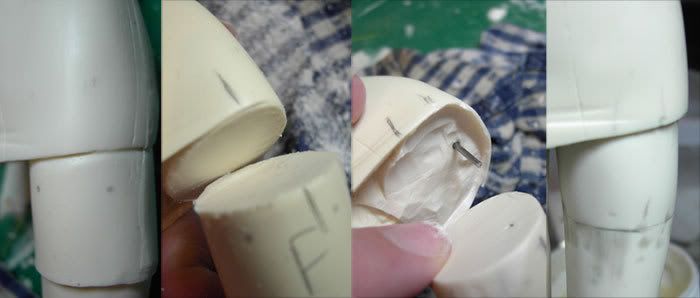

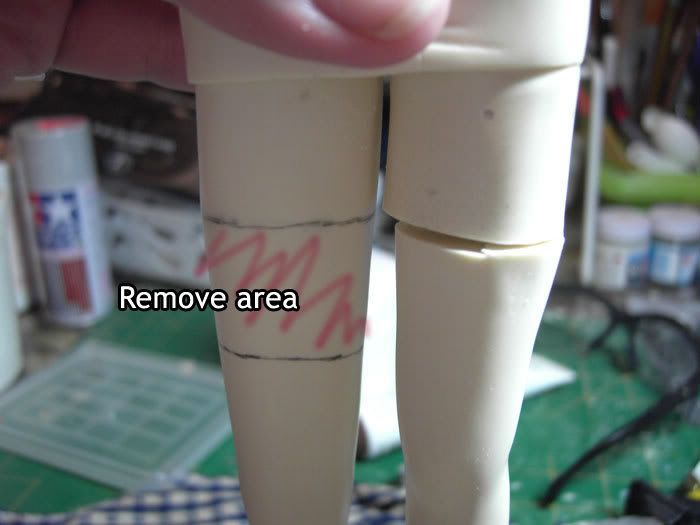
Now the joins left where I removed 2cm off each thigh are very bad, also Bridget being a young male could probably do with thinner thighs anyhow so I fixed up the legs by pinning and supergluing the legs to their new thighs, then sanding a lot of the excess away with a Dremel. My Dremel is broken at the moment, when its on it's full speed and I can't fix it, when I sand (or anything) it's extremely hard to control and I end up making a bigger mess that if it was working correctly, no problem really just means more putty.
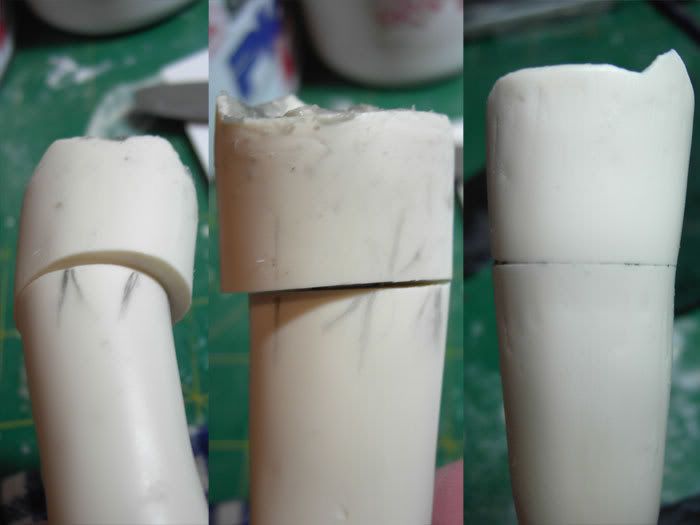
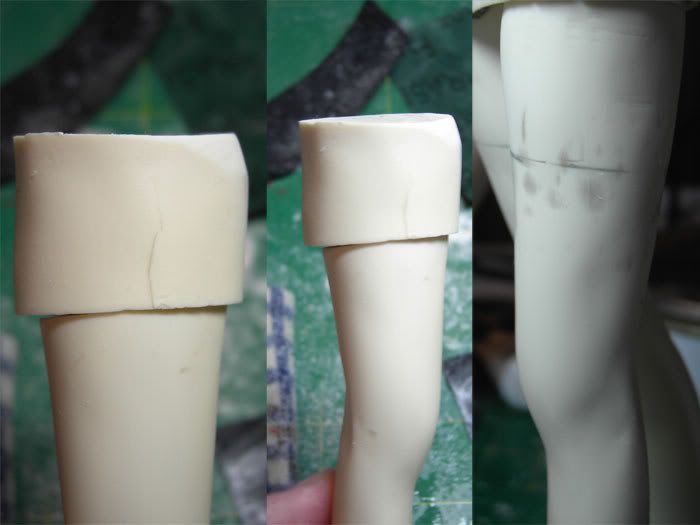

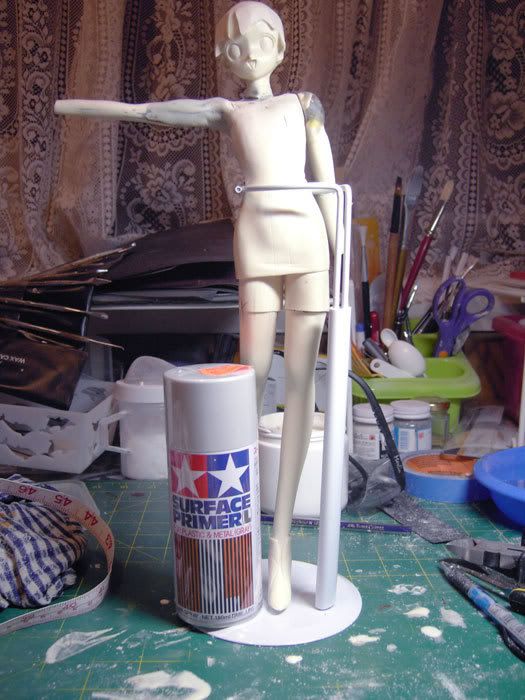
Overall the result of shortening the legs is much easier to see now they are evened out at that join. I liked the idea of having one leg behind him, a bit more interested than just having them together, seeing as the torso looks insanely bent (in the original sculpt) I thought I'd give it an anatomical reason for leaning back so far, beforehand with the legs just straight together it looked weird.

Saturday, June 07, 2008

Left arm repositioning, hair removal & leg resizing

-------------------------------
Time: 6 hrs 9 mins
Total Time : 8 hrs 34mins
-------------------------------
This is a huge update, it's been 3 months since I worked on the kits, partially due to being overseas for 6 weeks and the rest is atypical procrastination due to my life being quite hectic and a lot going on!!! I've been working on Bridget over the last week for an hour or so a day. Instead of perfecting each section then moving on (like I was doing with Shuichi) I'll keep everything rough and keep adding more details as I go along.

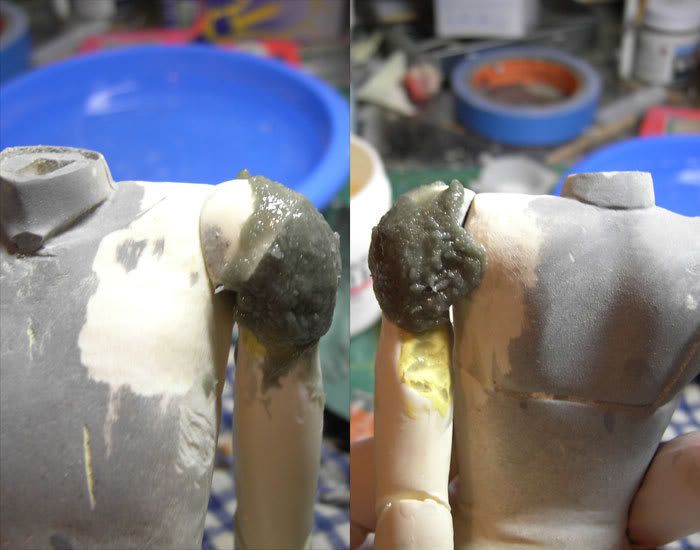
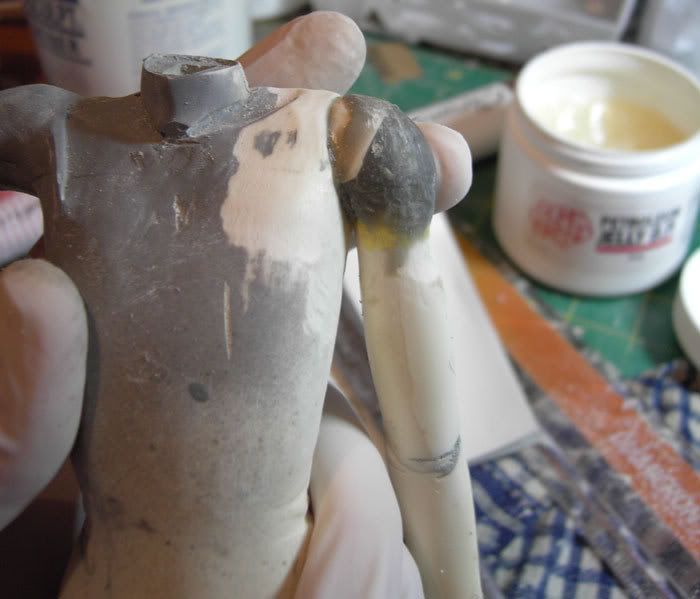
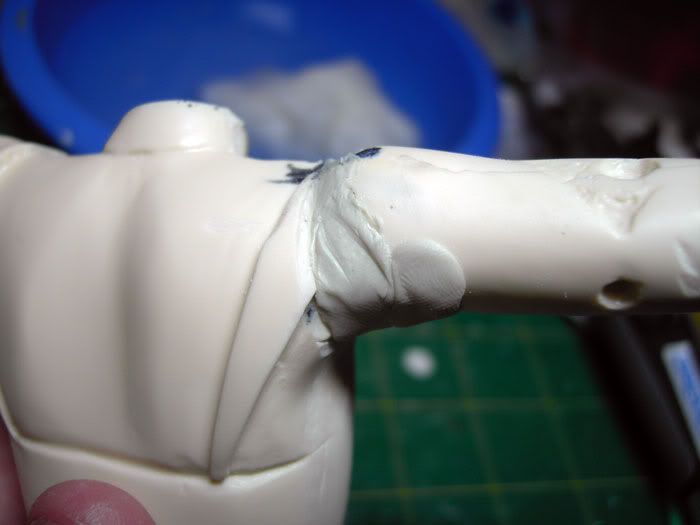
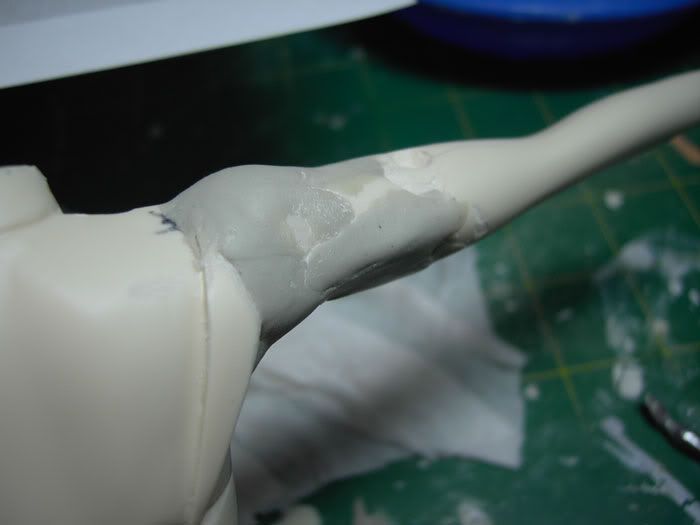
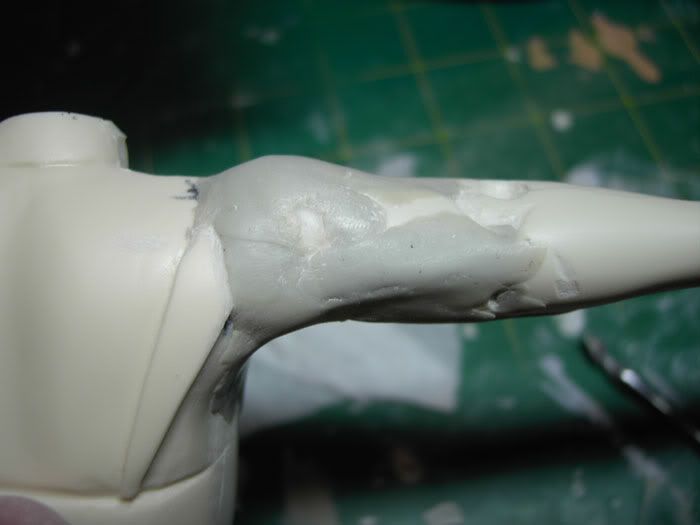
First, I wanted to reposition the left arm. The arm was cut at the elbow, forearm turned around and pinned back together to be straight. The upper arm is also now facing the other way, as in where the bicep was is now behind and has become the tricep. The arm was positioned to be sitting behind the body as per the reference pic and puttied to close the gap between the top of the arm and the body to form the shoulder.


Next, I wanted to remove that awful hair, I can't stand when hair is sculpted on to a garage kit instead of being a separate piece. This took hours, maybe 3 hours with a Tamiya hobby saw. The dremel cutting wheel wouldn't budge it and the sanding wheel wouldn't reduce it as I hoped to sand it away after the wheel didn't work, so it all ended up being done by handsawing, it was rotten, I had to keep the blade saturated with Vaseline so it would move through the chunks. I've left some bangs there for now but will probably remove them. You can see all the little chunks I removed.

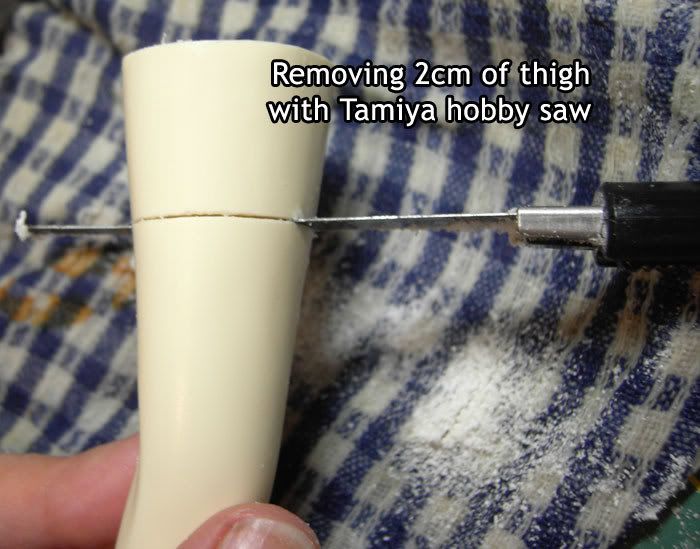
Lastly the legs are far too long, I planned to take 4 cm off each, but after taking 2cm from the thighs I was happy and didn't feel the need to take the rest off. Again using the Tamiya saw but this time it was a breeze, the resin for some reason wasn't as difficult to get through as the resin on the hair.

Next job to do is to fix up the joins on the thighs from the shortening of the legs and to roughly sculpt the shoes.

Friday, March 14, 2008

Fill the gap and resculpt the arm

-------------------------------
Time: 55 mins
Total Time : 2 hrs 25mins
-------------------------------
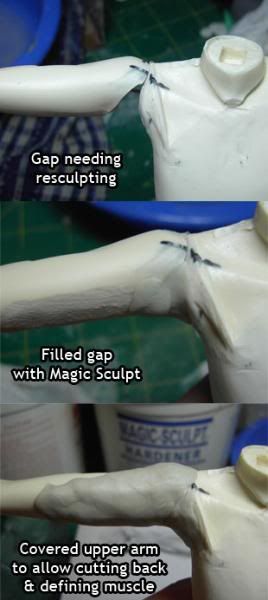
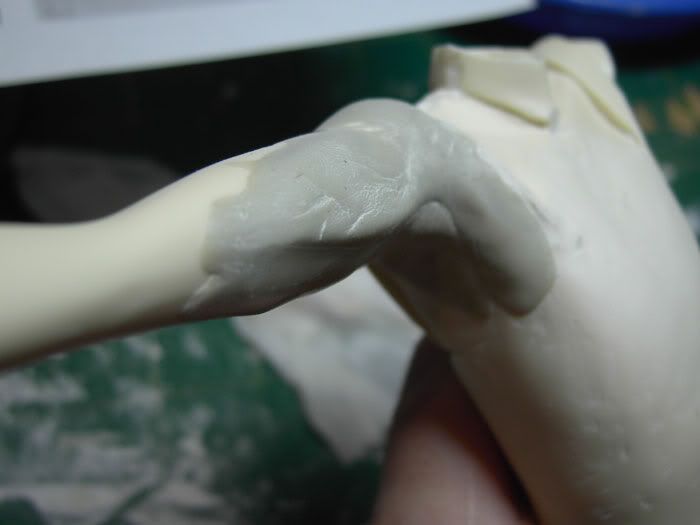
There's quite a large gap here and even if there wasn't I would have resculpting the arm anyway, it's just not boyish enough. Alot of the time he's drawn girly, but I don't want him to be too feminine with his actual physique/muscle tone. Using Magic Sculpt it was a learning session even though I've used it so many times in the past that's only really to 'lay' over things, I haven't really sculpted anything with it. This isn't finished, but I'm not going to spend too long on it, I'll probably prime it to have a look at the general arm shape, I'll probably take some off the bottom I think there's too much there because of the position of the original arm, the shape doesn't exactly match what it would look like with the arm raised. We'll see, but so far so good!


Wednesday, March 12, 2008

Project - Take off!!!

-------------------------------
Time: 1hr 30mins
Total Time : 1 hr 30mins
-------------------------------
I made the decision last November that I wouldn't work strictly on one mod anymore because it just takes so long and I get sick of looking at the same project, especially considering I don't get to work on my hobby all the time like I wish to.

So today I made a start on Bridget, the reference picture I'm using is drawn by Saigado, all though I most likely wont use his face, just the pose.

So to start I wanted to remove the decoration or whatever it is on the front of the chest. I did it with a hobby knife then sanded.


Next step (seems to be a theme of mine) is to remove the breasts, it's kind of distracting trying to plan out a boy mod when there's boobs staring you in the face >_<

To start I used the cutting wheel in my Dremel set, doesn't make a neat job of things but makes a start.


Then I use the sanding piece and clean up the rough parts. Certainly allows me to see what's going on better and of course alot more needed to come off to give him DFC . . . . (don't ask lol), following on cleanup with 180grit piece of sandpaper (don't use this on kits you are building, it's rough as anything, only for mods!!!) and wet sanded, followed by 320grit for a nice finish, wet sanding always keeps the finish neater.Now the arms need adjusting, they are both in the wrong position, I figured I'd start with the easy one first as the shoulder shape (in an anatomical sense) will barely change with the repositioning. I used the cutting wheel for the most of it but couldn't get under the armpit so used a mini hand hacksaw to cut some more and then snapped it off. Unfortunately it left a massive sharp piece and I cut myself!!! The first injury for the project lol, I always get them. The first cut didn't take enough off so I had to redo it a few times. Then I sanded it slightly and pinned ready for rebuilding the gap. I not only left the surface rough, but even scratched it madly with the hobby knife, this helps the putty to adhere to the surface, with such a big gap if you just filled it with material it's likely to slide off.Lastly I've taken a picture of my setup to help with dust reaction, since doing a bit extra work on the arms after I took the photo I realised you can dip the bits in water and use the dremel pieces on them and dust reduces dramatically. The whole time I'm using a dust mask anyway but this is handy to know.

Wednesday, December 05, 2007

Cloak redo

-------------------------------
Time: 6hrs 14mins
Total Time : 94hrs & 41mins
-------------------------------

6 months has passed since the last update. I've been working on him on & off during this time but the whole project was just wearing thin and I wasn't happy with the cloak. I recently started other projects and now that I've had a bit of a break I'm doing some extra bits on the side with Shuichi. He won't be my primary project but I'll continue to at least pick away at him.

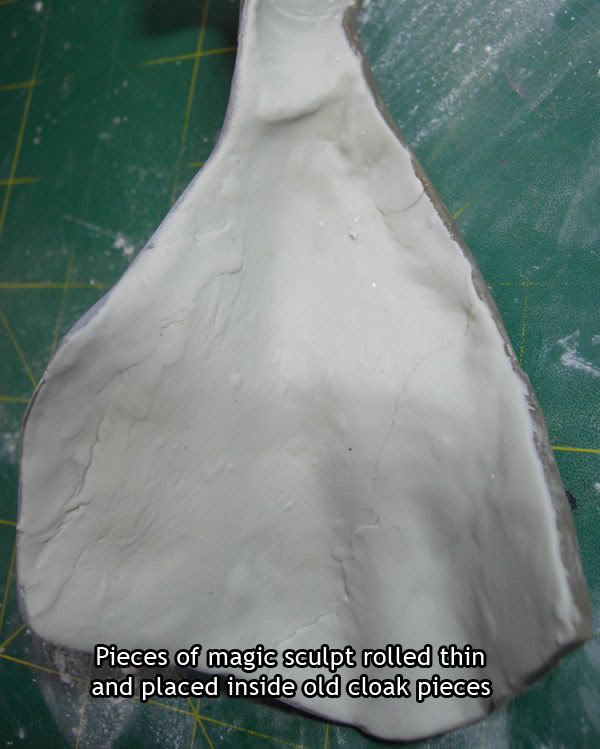
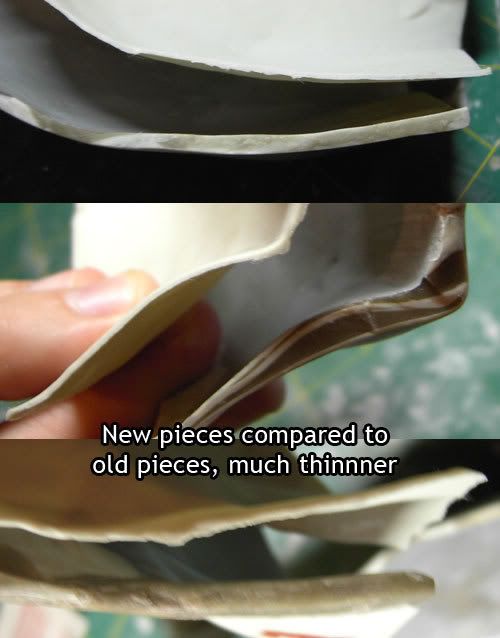
Okay, my biggest beef with this entire mod is that his cloak is too thick, I've been pretending I didn't care the whole time but now I'm changing it. I didn't want to create too much work so I decided I'd duplicate it by resting some thinly rolled magic sculpt on the inside of the cloak (as it fits his torso snuggly) and build from there! The inside of the cloak was first coated in Vaseline so I could separate the old from the new. Unfortunately I couldn't copy the whole lot with the armholes otherwise I wouldn't be able to get the new piece out of the old piece.


I had to add a few miscellaneous pieces as the main part I rolled out obviously wasn't the correct shape. I left to cure overnight and with a little persuasion the pieces separated and I love the new thickness!!!


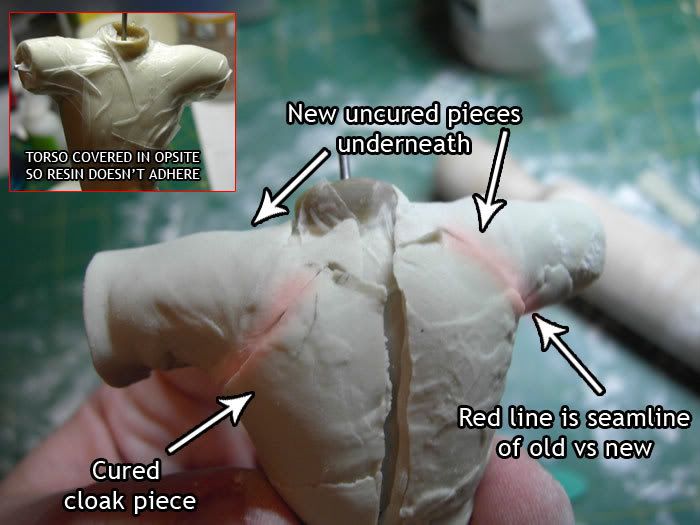
Then to make up some of the gapped areas and the sleeves, I covered the torso in medical opsite, rolled some new pieces over the arms and torso and pressed the recently cured cloak pieces on top of them very firmly. I'll leave this to cure overnight.